
Print Awareness
Understanding how books and printed words work.
Understanding how books and printed words work.
Long before children read words, they learn how books and print work. You teach this simply by reading together and letting them take part.
Handing over the book is a lesson. Ask them to find the front, turn to the first page, and tell you where to start reading. Those are real reading skills, learned before any word is decoded.
This one small habit teaches an enormous idea: the story comes from those marks, we read left to right, and each clump of letters is a word.
Stop signs, the cereal aisle, the bus number, your street sign, a birthday card. Environmental print is free, everywhere, and full of letters your child already half-recognizes.
Make the grocery list out loud. "We need milk — /mmm/, that's M." Watching an adult write shows that print carries a message someone chose to put there.
Print awareness is the ability to understand that print carries meaning (as well as understanding how print works and the conventions of print for reading/writing).
Research outlines the importance of employing Structured Literacy Principles to teach key literacy skills (phonics, phonemic awareness, reading fluency, reading comprehension, vocabulary, spelling, writing) in a systematic, structured, cumulative, explicit and diagnostic fashion. The same structure applies to teaching emergent literacy skills (oral language, phonological awareness, alphabet knowledge, and print awareness).
Research is clear that emergent literacy is taught best when instruction follows the four Structured Literacy Principles. Here is what each one looks like for print awareness.
Instruction follows a logical order, begins with the easiest concepts, and progresses to more difficult concepts (EX: Teacher's scope and sequence for teaching print awareness starts by teaching easier skills such as identifying front/back/spine of book, knowing where to start reading, differentiating print from pictures and progresses to harder skills like reading top to bottom and left to right, concept of word, concept of letter, 1-1 correspondence).
Each step must be based on concepts previously learned and continual review until mastery must be a part of practice. Systematic, sequential and cumulative learning enhance explicit instruction (EX: Remember last week when we learned about starting at the top of a page and reading right to left? This week we will learn to point to each word as we read.).
Teachers use approaches such as gradual release of responsibility models (I Do, We Do, You Do) where the teacher models and students have multiple opportunities to practice with support and independently (EX: A teacher may model how they tell the difference between print and pictures on the front of a book, talking students through it as they go. Then, they may have students practice identifying the print and pictures on the front of a few other books, with teacher guidance and feedback. Finally, the teacher may create piles of print cards and picture cards for students to sort independently into two different piles at their desk).
Teacher assesses where students are, progress monitors as frequently as possible, diagnoses where skill gaps exist, and adapts instruction as needed (EX: Teacher uses a print awareness assessment to gauge students' skills and decide where to start print awareness instruction. Teacher also regularly progress monitors print awareness skills so they can know when to introduce a new concept). Choose a project created assessment/CBM (print awareness with nursery rhymes assessment) or an existing assessment (PALS) to get to know your students).
Findings below are drawn from What Works Clearinghouse educator practice guides published by the Institute of Education Sciences, U.S. Department of Education.
The Works Clearinghouse (2022) report, "Preparing young children for school: Educator's practice guide," (pg. 54-61) indicates strong evidence for intentionally planning activities to build children's vocabulary and language; building children's knowledge of letters and sounds; using shared book reading to develop children's language, knowledge of print features, and knowledge of the world. From these three recommendations, building children's knowledge of print features is the most relevant to print awareness. The WWC report recommends a range of print awareness activities such as reading informational and narrative texts, choosing books with different features (different font styles, with pictures/without), reading books for different purposes, discussing pictures/words/print features, etc. https://ies.ed.gov/ncee/WWC/Docs/PracticeGuide/TO4_PRACTICE_GUIDE_Preparing-for-School_07222022_v6.pdf
The general progression of skills from most basic to most difficult is below. However, keep in mind that some skills can/may be taught simultaneously (EX: while working on differentiating print from pictures you may also be modeling concepts like front/back of book, where to start reading, etc. Since lots of print awareness is learned from adults modeling and talking aloud, you may be introducing lots of print concepts even though there may be a lesser focus on some).
1. Differentiating Print from Pictures
2. Identifying the Front and Back of a Book (and Spine, Author, Title, Illustrator)
3. Identifying Where to Start Reading
4. Directionality
4. Voice/Print Matching and Concept of Word
5.Concept of Letter
6. Concept of First and Last
7. Lowercase and Uppercase Letters
8. Punctuation
Each skill is outlined below, with sample activities to target each skill. A more comprehensive list of sample activities is available via the "print awareness" tab on the literacy portal.
Adults have a lot of existing knowledge about books that was gleaned from watching teachers and/or parents read and write. Absent this knowledge, children must be taught everything including the most basic concepts. For instance, a preschool or pre-k student coming from a home where there is not much reading or modeling of print interaction in the home may not be aware of the difference between print and pictures in texts.
Picture and Word Sort: While books are often the best place to introduce print concepts, it can help to introduce some print concepts outside the context of a book first. You could do this by modeling a picture/word sort with students, having them do a sort with a peer, and then having them either sort independently or be called out individually on each page of a book to identify where the pictures are and where the print is. Prepare two sets of cards. One set will have very simple pictures, including mainly pictures of items students are likely to be able to identify. The second set should contain some very basic words (the words themselves don't matter much since they do not have to be read by you or the students). Mix the two piles together. Walk students through how you identify print/words (i.e., they have letters) or pictures (they are colorful, look like real items, etc.). Then, turn over cards and have the students help you sort the pictures/print into separate piles.
Read Aloud, Engaging Students with the Text: After sample activity #1, you can transition to practice with a read aloud. Start on the front cover together, asking the whole class to help you find the picture on the cover and then the words on the cover. Explain that the words are the title of the book, and that those words give a hint to what the book will be about. Continue reading the book. On each page, call on a student to either point to the print or pictures (or both).
In order to eventually learn to read, students will need to have book handling skills. For instance, to read a book in the correct sequence and to be able to read words, an adult or child generally needs to be holding the book upright, reading top to bottom and left to right, etc. This knowledge starts with being able to identify the front, back and spine of a book. Children learn to do this as adults talk them through the process of how to identify the front and back of the book, how to hold the book, etc.
Read Aloud with Thinking Out Loud: A teacher simply picks and reads a book aloud to the students, thinking aloud to students to model their own thinking about books, book handling, etc. (EX: Today we are going to read "Brown Bear, Brown Bear, What Do you See? by Bill Martin. First, I need to figure out how to pick up and hold my book so I can read it to you. I know that the front of the book usually has a picture on it and a title, so I look for both a picture and some words. Look, I can see here a picture of a brown bear and then I see some words up here. The words are the title, it says 'Brown Bear, Brown Bear, What Do You See? Watch me as I point to each word of the title. I always start reading on the front of a book, it is called the cover or title page. It is important to see the picture and hear the title so I can guess what this book may be about. I think this one may be about the sounds a brown bear hears outside."). The same process can be repeated to point out features of the back of the book at the end of reading.
Front/Back Sort: Make some photocopies of the front and back of a number of your students' favorite books. Remind the students of how to identify the front and back of books, using a separate familiar book to model. Then, have the students sort the photocopies of the front/back of the books into two piles, providing feedback and guidance as they go. Later, during future read alouds, call on a student helper to help you make sure you find the front/back of the book and know where to start reading.
Once students can identify the front/back/spine of books as well as the title, author and illustrator… they need to learn where to start reading on each page. Most of this knowledge comes from a teacher or parent modeling during read alouds or morning messages.
Modeling on Every Page During Read Aloud to Start: When you first start reading, you should constantly think out loud about what you are doing (EX: "Let's read a book\! Now that we've read the title, I see a lot of words on this first page\! Hmm, I need to remember where to start reading my words, so we can hear what this book is about\! I always remember; we read top to bottom so I need to start at the top of my page. Then, I read left to right, so I start on this side and move this way as I read the words. Watch me point to each word as I read top to bottom and left to right. Which way should I read again?"
Read Aloud With Student Guidance: Once you've modeled where to read a number of times during a number of read alouds, it is time to involve the students. You could pick one particular student to be your reading helper, asking them to show how to hold the book right side up, where to start reading on the first page, where to go next, etc. Or, you could ask a different student to help on each page. Remember, you may want to limit the number of pages you do this on for each read aloud if it is the first time reading the book, so you don't interrupt the flow of the story too much (maybe the first two pages and last page only).
Once students know where to start reading and where to go next, they need to make the connection that the reader is pointing to each word as they read, that each word is separate, and that each word carries a meaning that helps give the overall sentence meaning. Once again, modeling during read alouds or morning messages are one of the best ways to do this initially, but remember to then turn this over to your students (EX: Once they have experience, have one of them come up and use a pointer to point to each word in the morning message as you read).
Special Pointers for Morning Message: Morning message is an amazing way to build print awareness and other emergent literacy skills with students, but it really only works if you do it daily as a routine. You start out the process heavily modeling and thinking out loud as you read early in the year, and then transition to engaging the students in the morning message reading process. One way you can engage students is by creating a special pointer you use (and eventually the students use) to point to words as you read. Once students are used to having you read/point to each word of the morning message daily, ask one of them to come up and help point to each word as you read. Eventually, you may even get some advanced students that can read a morning message with familiar words on their own, pointing to each as they go. Here are some images of special pointers:
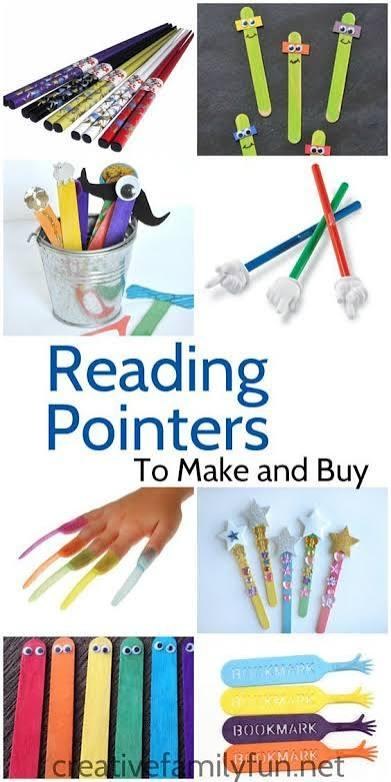
Watch morning message #1 and morning message #2 to see how teachers build print awareness and other literacy skills through morning messages.
Nursery Rhyme Reading With Pointer: Put a familiar nursery rhyme on sentence strips and place each line in a pocket chart. Every time you read the nursery rhyme, use the special pointer to point to each word as you read. Eventually, invite students up to point to each word with the pointer as they say the familiar rhyme. Afterwards, ask them to count each word in the sentence by pointing to each word and counting as they go. Point out that sentences are made up of words and that words help show the meaning of our sentence (i.e., if we removed "little" from "Twinkle, Twinkle Little Star" it would change the meaning of the line/sentence.).
Scaffolded Writing: Scaffolded writing is a gradual process you can use for open journals for pre-kindergarten. Start by stapling blank pieces of computer paper together and putting a journal cover page on the front where a student can write their name (see the literacy portal for sample journal cover pages). Then, have the students start by drawing a picture every day. To start out, you will circulate and ask them about their pictures. You can then write out a sentence about what they tell you, modeling print awareness skills like concept of word. You can do this by telling them you will count out the number of words in their sentence on your hand and then draw a line where you will write each word of their sentence. After you are done drawing the lines and writing each word of their sentence on the lines, go back and read/point to each word in their sentence. Then, ask them to read/point to each word in their sentence (guiding their finger if necessary initially). Over time, you will eventually ask the student to count the number of words in their sentence, draw their own lines, and attempt to write their sentence themselves (but this is a gradual process and will take quite a while, and initial student attempts may mirror the Ehri's stages of reading/writing---for instance, they may start by writing just one letter per line that represents the initial sound in a word).
Once students learn that sentences are made up of words, words carry meaning and that words impact meaning of the sentence, they will need to learn that words are made up of letters--- and that letters contain sounds that usually help you know how to spell the word.
More With Morning Message:
*As the year progresses and students get more and more comfortable with morning message, you can ask them to do more and more advanced print awareness skills\! For instance, early on you might ask students to come up and share the pen (using marker or pointer) to circle or point to a letter they know in the morning message. Later on, you could ask them to count all the letters in a word or you could even leave the initial letter off of a word and ask a student to fill in the missing letter based on the sound they hear at the beginning of the word.
Work With Student Names: Write each student's name on a half of a sentence strip. Tell them they will be learning more about their name, including how many letters it has. Model for the students how you can count the number of letters in your name, cut it up to separate each letter using scissors, and then reassemble it back in the right order. Have the students do the same exploration with their own name, providing guidance and support with counting letters, cutting, and reassembling their name.
Students may struggle with letters/words because they do not yet understand the concepts of first and last, particularly as they apply to letters/sounds in words.
Engaging with a Book or Morning Message: You can model first/last in multiple ways using a book or morning message. You can model identifying the first word on a page and the last word on a page, the first letter in a word and the last letter in a word. Eventually, encourage students to practice (EX: Come up and circle the first word in morning message or circle the first letter in an particular word).
Practice With Objects: Place objects in a row on a kidney table. Work with small groups of students, asking each to come up and pick the first object or last object in the row. Once they grasp this, you can move to a book and work on identifying first/last word on a page, first/last letter in a word, etc.
You should already be practicing the difference between uppercase and lowercase letters to develop the alphabetic principle. However, from a print standpoint students need to learn the relevance of upper and lowercase letters for reading and writing (i.e., sentences start with capital letters, most words that don't start a sentence are just lowercase unless they are a specific name of a person/place/thing, etc.).
Stamper Practice: Create a small grid of upper and lowercase letters that a group of students are familiar with. Give each student a grid and a stamper and ask them to stamp whichever you say (i.e., stamp all the uppercase letters).
Scaffolded Writing: As you walk students through scaffolded writing, you can model your think aloud process (EX: "When I write your words, I know I should start with an uppercase letter, because sentences always start with an uppercase letter"). Eventually, you will remind students of this as they are writing or after they have written (EX: "Read me back what you wrote on your scaffolded writing lines. I see here that you started your sentence with a lowercase letter. Is that the way you should start it out?").
Once students understand how to start sentences, they also need to be aware of how you finish sentences (for the purpose of reading and how it affects your expression/pausing as well as for writing and how it affects which punctuation mark you choose.
Thinking Out Loud During Read Alouds or Morning Message: Eventually, you will want to start thinking aloud during books to explain punctuation marks (EX: "Brown Bear, Brown Bear, What Do You Hear? Our title ends with this funny mark. That is called a question mark. It is how we end a sentence that asks a question. This question asks what the brown bear hears, so it ends with a question mark.").
Finish the Sentence: Once students are familiar with periods, question marks, and exclamation points… pick some lines from a favorite book you read regularly to the students. Write down 5-6 lines from the book, leaving the punctuation mark off the end. Read the line to the students like you would if you were rereading the book. Ask them if they can identify what punctuation mark should go on the end. If needed, have them check the page in the book to see if they got it right. Provide feedback on any lines they miss.
Ready-to-print classroom toolkits from Educational Solutions for Children’s Birth–5 Literacy Resource Collection. Each one opens with a teacher welcome and a standards-alignment page (Birth–3, Preschool, Pre-K, Kindergarten), followed by activities, materials and observation tools you can use in whole-group, small-group, intervention, literacy-center and take-home settings.
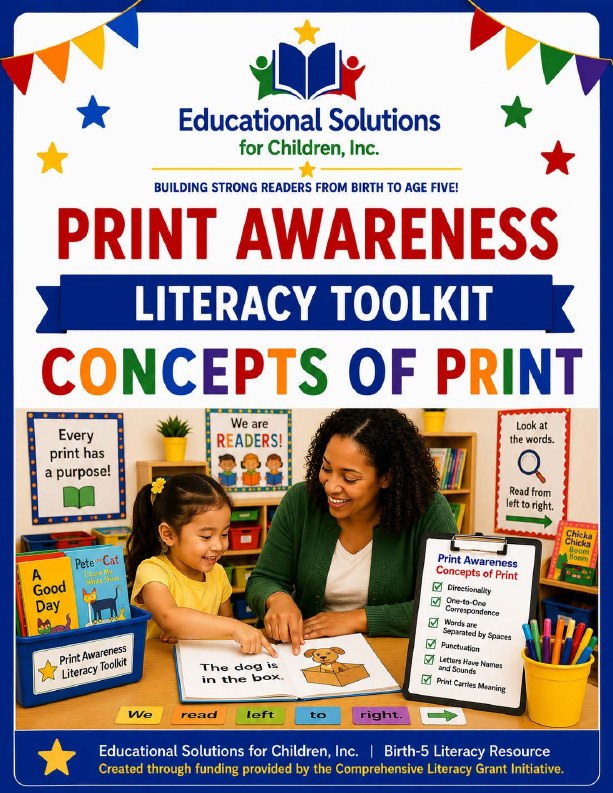
Literacy Toolkit · 13 pages · PDF 2.7 MB
Concepts of Print
Helps children learn the basic rules of how print works — that we read left to right, how books work, and that letters, words, sentences and spaces carry meaning — so they track print and read with confidence.
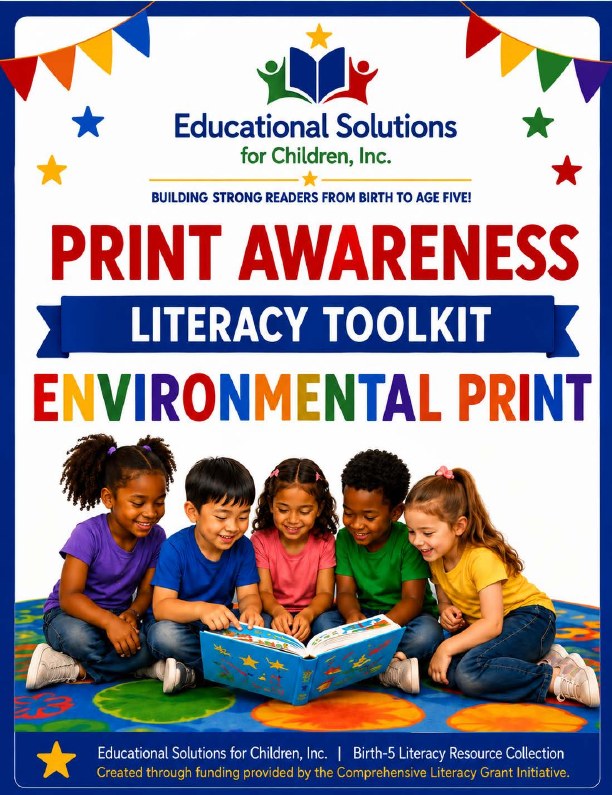
Literacy Toolkit · 46 pages · PDF 6.9 MB
Environmental Print
Uses the print children already see on signs, labels, packages and menus to build reading readiness, print motivation and vocabulary, and to help children understand the purpose of print in everyday life.
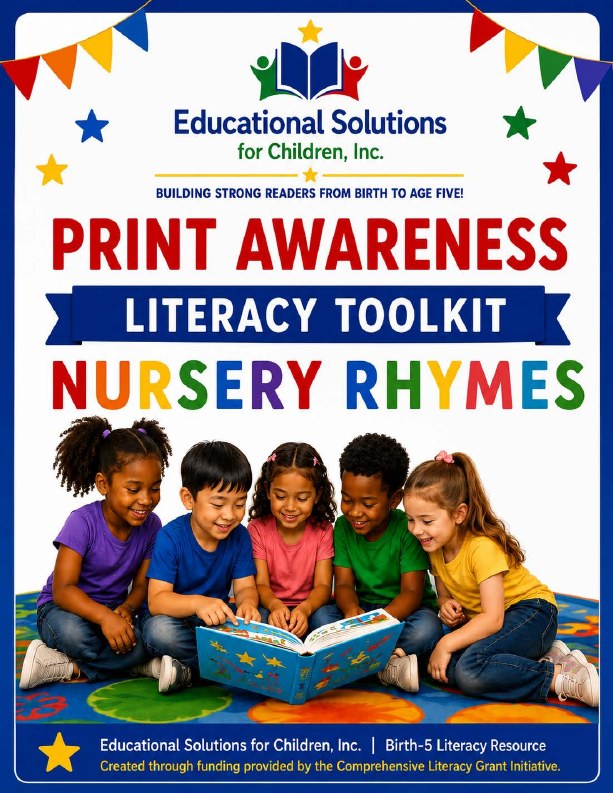
Literacy Toolkit · 14 pages · PDF 3.2 MB
Nursery Rhymes
Read, cut and sequence familiar nursery rhymes while tracking print, finding first and last words, and spotting capital letters and punctuation. The companion pocket-chart set adds printable sentence strips with picture vocabulary for whole-group shared reading.
Download toolkit (PDF) Pocket chart sentence strips (32 pages, PDF 4.1 MB)
The video library has short clips of real teachers and parents modelling every one of these skills with preschool and pre-K children.
A free, research-based home for the four practices that build readers before reading begins — written for preschool and pre-K teachers and the families they partner with.